
Obtaining and offline securing ether for the upcoming Ethereum launch
A very long and detailed guide to purchasing and securing ether. Anyone with less than 10 years of programming experience should ask a friend for help as soon as they get stuck.
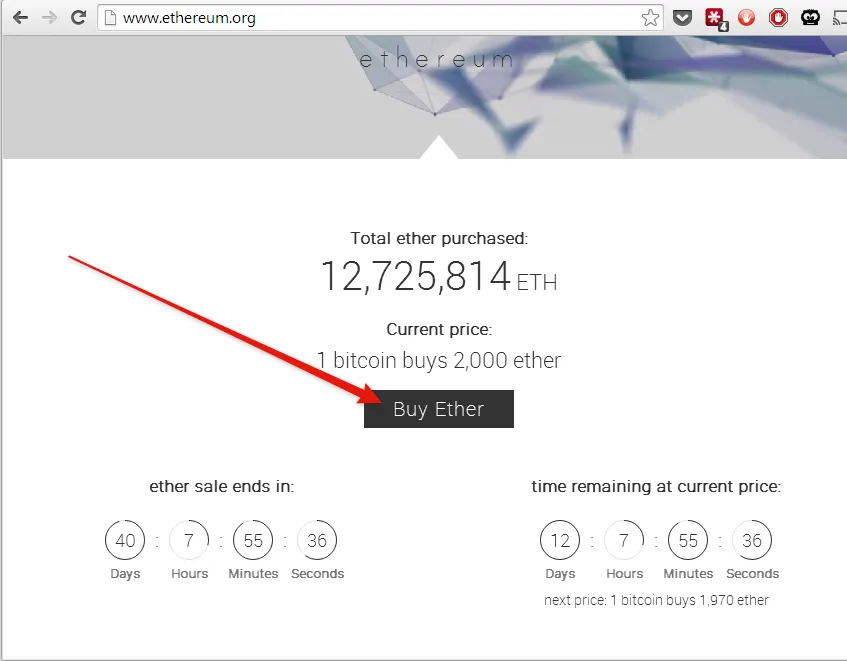
Buying the ether
Head over to ethereum.org and click buy ether:
Read and accept the user agreements to reach the registration form:
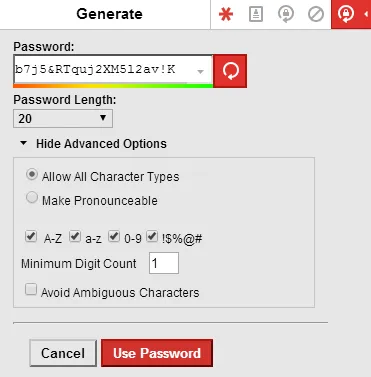
A very strong password is required. I use LastPass to generate mine. Because we’ll be encrypting our wallet using an additional password later, I won’t consider this one very sensitive.
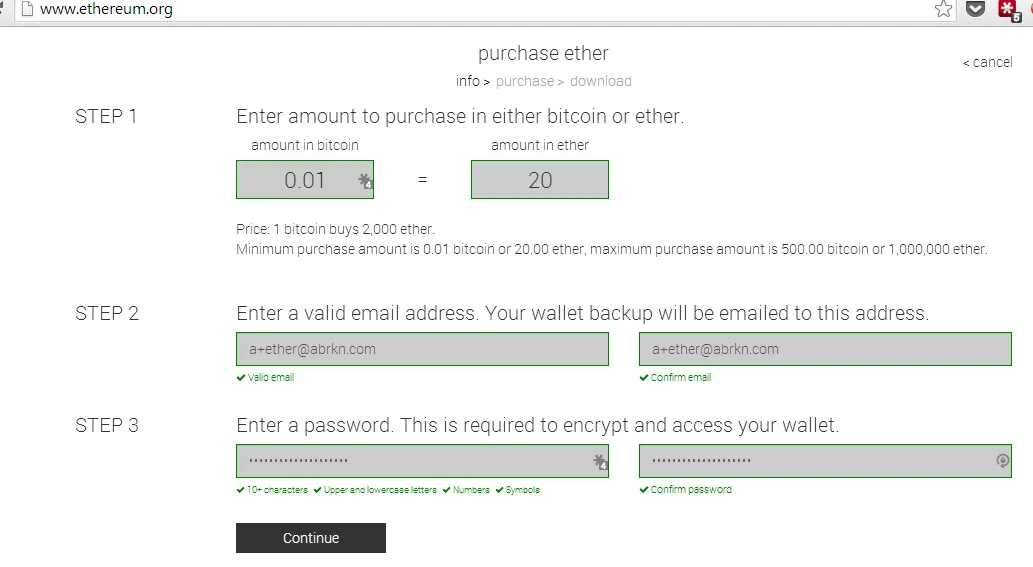
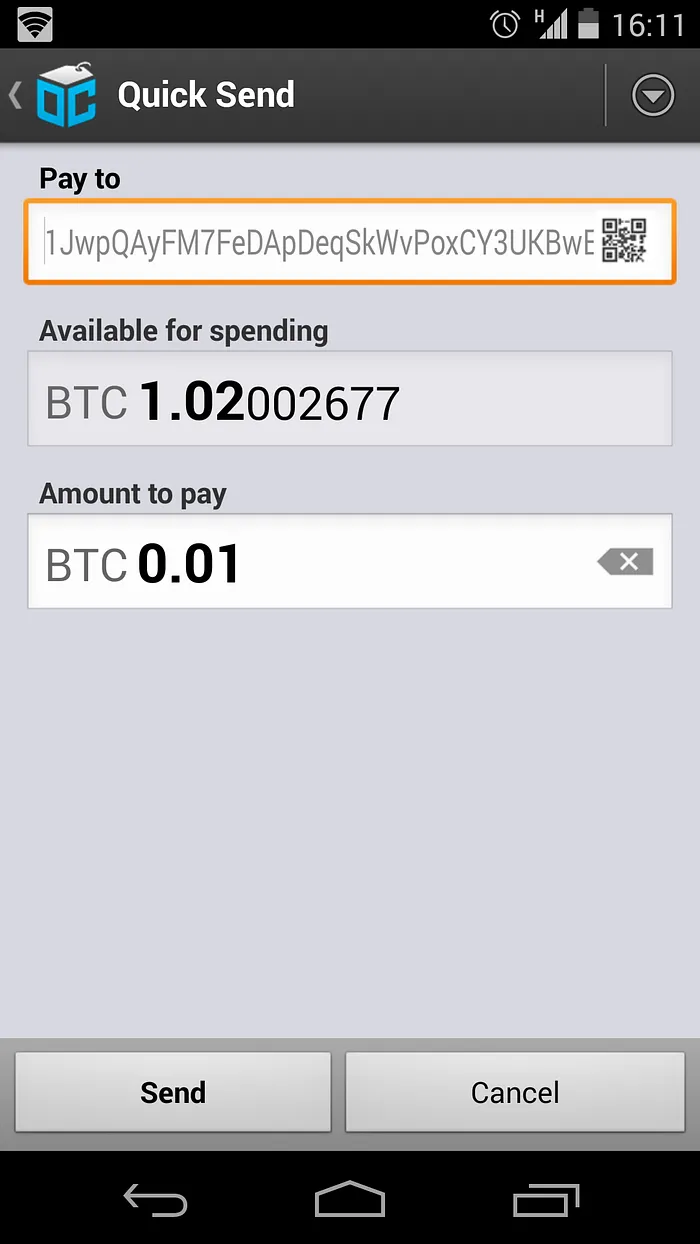
Send the requested amount of bitcoin to the address, in my case 0.01 BTC. I use the Blockchain.info or Hive apps for Android, which both support sending funds to QR codes.
The payment has already been registered by the website and we can proceed to download the wallet file.
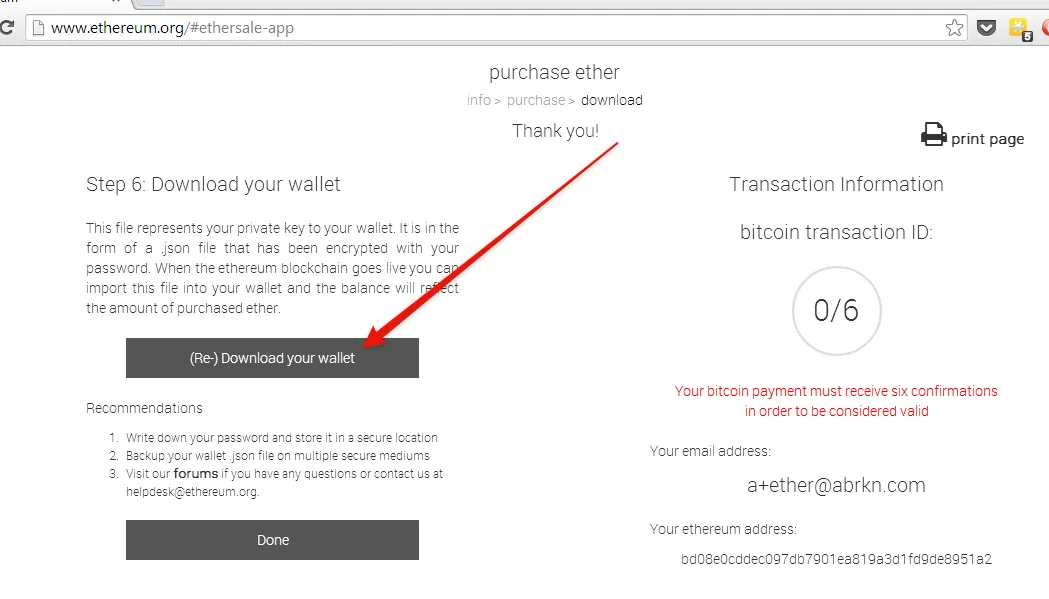

The file, ethereum-wallet-xxx.json is encoded in a popular format called JSON.
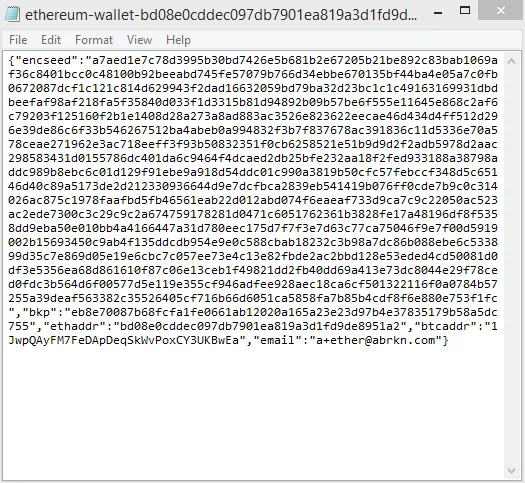
It’s not formatted for humans, but if we pretty it up a little it looks better:
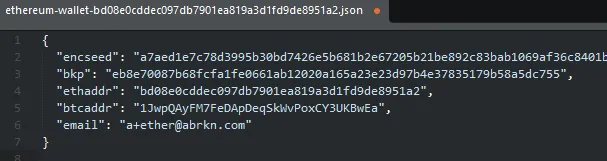
It contains a few values, encseed, bkp, ethaddr, btcaddr, and email. I haven’t taken the time to read up on the format, but I assume that encseed is encrypted seed (private key) of our Ethereum wallet. It’s probably encrypted with the password we used in the registration form.
Encrypting the wallet
This is where the more technical part starts. I’m sure there are other ways of doing this, but by using tried and trusted unix command-line tools, we can be confident that the backups can be restored no matter how much time passes.
If you’re on OSX or Linux, the command line tools will already be installed on your system. If you’re on Windows, like me, we’ll be using cygwin, which lets us run linux programs.
You might want to ask a friend who knows Linux to help you with the steps. It’s not necessary to reveal the passwords to your friend at any step.
Open a terminal/cygwin window and change the current directory to where you downloaded the wallet:
$ cd /cygdrive/c/users/Andreas/Downloads/
Verify that the wallet file is present:
$ ls ether*
ethereum-wallet-bd08e0cddec097db7901ea819a3d1fd9de8951a2.json
As you can see, the wallet is named ethereum-wallet-bd0…json on my system. We’ll rename it to ether.json to make things a little shorter:
$ mv ether* ether.json
And confirm that the file was renamed:
$ ls -lh ether.json
-rwxrwx—-+ 1 Andreas None 1.5K Jul 24 16:24 ether.json
I use the command ls -lh to see the file size as well as the name. We see that my file is called ether.json and is 1.5K bytes (1500 bytes).
First, we’ll encrypt the file with the des3 algorithm. At this point you must invent a very strong password. I’ll be using the password phrase correct horse battery staple without spaces, correcthorsebatterystaple. I’ll refer to this password as the paper password, as opposed to the wallet password from the registration form.
Encrypt the ether.json file with DES3 and store it in ether.json.des3:
$ cat ether.json | openssl des3 > ether.json.des3
enter des-ede3-cbc encryption password:
Verifying — enter des-ede3-cbc encryption password:
Let’s look at the des3 encrypted version:
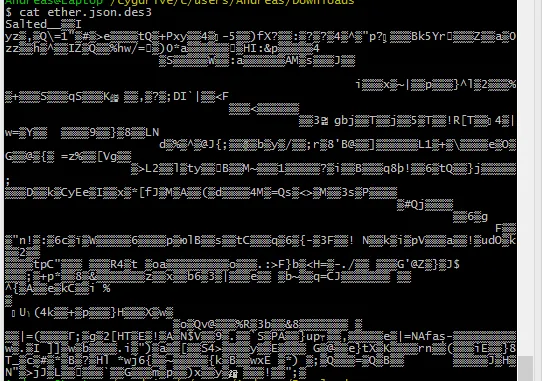
The file is now in binary and cannot easily be displayed in our terminal or printed on paper. The square looking characters are the ones that have no visual representation.
This makes printing the encrypted wallet a problem.
Luckily, there are tools to convert binary data to more readable formats. We’ll use a tool called xxd which limits the character set to 0-9 and a-f:
$ cat ether.json.des3 xxd -p -c40 > ether.json.des3.xxd
We’ve now created a pretty good looking textual representation. Open up the file, called ether.json.des3.xxd, in Word and decrease the font size to 9 so that the lines fit:
I usually write a note at the top or the bottom of the files so I don’t forget what format they’re in.
I usually also include the names of family members who I told the password and the date of creation.
Now, the most important step. Print on a physical printer. Don’t feel tempted to store on Dropbox or a USB stick.
You should print a couple of copies and give one of them to your mom. Let’s verify that it works. I’ll pretend like we typed in the entire sequence of characters to a file called restore.txt using Notepad and opened up a shell window:
As you can see, the file was decrypted as expected using our paper password and the original contents of our wallet is outputted.
Optional: Encoding using QR
The printed format above is excellent because it’s exact. The only issue is that it would take very long to type. Finally, for the first time of your life, QR codes are useful. We’ll first encode the binary file, ether.json.des3 using a format called base64 and then create a QR code.
$ cat ether.json.des3 openssl base64 -A > ether.json.des3.b64
Open up the file, ether.json.des3.b4, in a text editor such as Notepad:
$ notepad ether.json.des3.b64
The file is 1976 bytes, in my case, which is quite large for a QR, but not close to the limit of around 4000 bytes. Copy the entire file to your clipboard (Select All, Copy)
Head over to https://goqr.me/ which has an easy to use QR Code generator. I’ve already pasted my clipboard into the text box:
Click on the Download button, copy my settings and download as PNG:
Create another Word document and insert the QR code you just downloaded:
As before, the most important step is that you print the code!
It is a bizarrely enormous QR code and I’m not sure any QR code scanner can read it.
Now, for the moment of truth. We’ll decrypt the file, qr.txt and retrieve the original Ethereum wallet:
Flawless victory! We’ve scanned the QR and decrypted using the paper password to retrieve the original wallet.
Destroying all the evidence
Through this process, we’ve managed to store quite a bit of digital evidence that a hacker can use to recover and steal our wallet. We’ll need to find and delete all of it:
- Find the email of the QR code we sent to ourselves and permanently delete it from your email.
2. Find the email of the wallet that ethereum.org sent you and permanently delete it from your email.
3. Delete all the files we used:
Andreas@Laptop /cygdrive/c/users/Andreas/Downloads
$ rm ether* qr.txt restore.txt
4. Set your printer and laptop on fire and kill any witness, human or otherwise.
As a last note, I actually included my wallet password (not paper password) on the print outs as I do not consider them to be sensitive. You can decide this part for yourself.
As you may have noticed, no passwords have been censored from my post. Once Ethereum is launched, you can have the 20 ether — if you’re fast!
I hope you enjoyed this tutorial. You can show your appreciation by donating bitcoin to 1abrknajSFpnz7MHjLkVnuvCbwd96wSYt.